

Help your kids get into the habit of turning off the water while they brush their teeth. After wetting their toothbrush, tell them to play their favorite song while the water is off (which should be around two to three minutes, the perfect time to brush their teeth).
Photo Credit: jupiter images

Switch Off Lights and Appliances
Kids can help out by turning off lights and appliances when not in use. Put them on “light duty” and have them go around the house shutting off lights that are not needed and turning off unused appliances.
Kids can help out by turning off lights and appliances when not in use. Put them on “light duty” and have them go around the house shutting off lights that are not needed and turning off unused appliances.
Photo Credit: Getty Images

Make Your Home Green
Your children can go with you to a local nursery and pick out their favorite plants to have in the house. This equals more oxygen for your home! Take this opportunity to teach your children about plant care as well and have them help you water and care for the plants.
Photo Credit: Getty Images

E-Waste
No more disposing of e-waste in the trash! Teach kids that batteries from everyday objects like video game controllers or Wii remotes should be recycled, as well as any electronic equipment. Place an e-waste bin in your home and label the container with a bright color so kids won’t forget!
Photo Credit: Getty Images
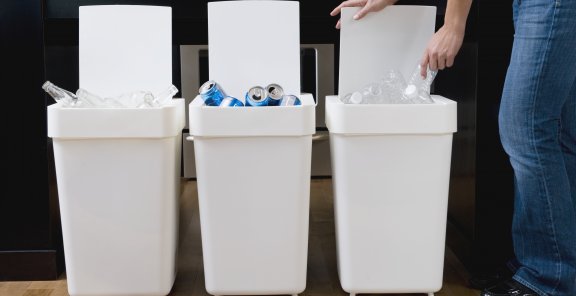
Sorting Fun
Make sorting recyclables a fun activity for kids. With color-coded bins, kids can sort paper, glass, plastic, etc. while singing a recycling song!
Photo Credit: Getty Images

Learn Green
When kids need new school supplies, take them on a hunt for eco-friendly school supplies. Have them search for supplies that say “recycled” or “eco” or “green” on the packaging and celebrate their finds!
Photo Credit: Getty Images

Plant a Small Garden
Whether it’s a flower garden or vegetable garden, kids can learn about green living by helping plant a garden. From seed to bloom, kids can see how rewarding it is to have a garden of their own!
Photo Credit: Getty Images

Buy Reusable Water Bottles
Have your kids choose a favorite reusable water bottle and pack it in their lunch box instead of a juice box. This way, you reduce waste while they enjoy drinking out of their cool water bottle!
Photo Credit: Getty Images

Donate Old Clothing
Have kids go through their closets and make a “donate” and “keep” pile. Teach them that donating their clothes helps reduce waste in the environment while helping those in need.
Photo Credit: Getty Images

Meatless Monday
Have kids vote for their favorite vegetarian recipe for Meatless Monday. Cutting down on meat consumption can help cut greenhouse emissions.
Have kids vote for their favorite vegetarian recipe for Meatless Monday. Cutting down on meat consumption can help cut greenhouse emissions.
Photo Credit: jupiter images

Double Take
For homework, help kids get in the habit of printing on both sides of paper. Place a sign above your printer for a friendly reminder or have kids ask their teachers if they can email assignments – that way, no paper is used!
Photo Credit: Getty Images

Go Organic
Take your kids with you to the grocery store and have them help you search for products that are labled organic, like milk, fruits, and veggies. They’ll be excited to help out the family when they make their finds!
Photo Credit: Getty Images
Resource: Homesessive


